In my previous blogs, I had talked about creating a Physical Architecture and Physical Schema for a File in ODI(http://exploitsinhyperion.blogspot.in/2016/11/loading-flat-file-into-oracle-using.html ) and creating a logical schema and data store for a File artifact in ODI(http://exploitsinhyperion.blogspot.in/2016/11/loading-flat-file-into-oracle-using_19.html ).
In this blog, I will be talking about creating a Data Server for Oracle database and adding a new physical schema for the same in Oracle Data Integrator.
The below snapshots show me connecting to an Oracle Database using the command line and creating the target table.
Now, the first thing that needs to be done is to create a Physical server for the Oracle Database. This is done by going to the Topology tab in ODI studio and expanding the Physical Architecture button and right clicking on Oracle and selecting the New Data Server button as shown in the below snapshot.
On clicking the “New Data Server”, a window pops up as shown in the below snapshot.
As shown in the above snapshot, I have given a name to the Data Server “ODI_USER_SCHEMA” and enter the credentials for the users.
The next snapshot shows we configuring the JDBC URL for the Oracle database.
On hitting the “Test Connection” button in the above snapshot, the system will ask me if I want to save the changes as shown in the next snapshot. I choose the “Yes” button.
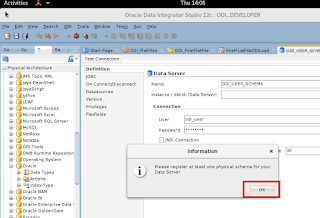
On clicking Yes, the system gives me an Information saying that I would need to register at least one Physical schema. This is shown in the next snapshot.
On clicking the OK button, I get a dialog box asking me to Test the connection.
On clicking the Test button in the above snapshot, the connection to the database has been established successfully as shown in the next snapshot.
Now, observe that the ODI_USER_SCHEMA has been populated under Oracle in the Physical architecture as shown in the next snapshot.
I right click on the Physical data server that I have created in the above snapshot, to create a new Physical schema.
On clicking the button, the Physical Schema window pops up as shown in the below snapshot.
I enter the configuration details for the schema as shown in the below snapshot. (Basically, the Schema dropdown is populated with the list of schemas that exist in a given database.)
Hit on the Save button to save the configuration changes for the Physical schema for Oracle DB.
In the next blog, I would talk about creating a data model for the Oracle database.


No comments:
Post a Comment