This is the big one…In this blog, I would be talking about
doing the install of Oracle Data Integrator on a Linux box. Disclaimer. Linux
install requires a bit of patience and some head racking on the keyboard. But
given the gift of time, it passes off smoothly.
Now, the ODI installables are downloaded as zip files. In order to start the install, the first step that has to be done is to extract the zip files into a single directory. This is shown in the next couple of snapshots.


The snapshot of jar files after extraction is as shown in the below snapshot.

Now the fun part starts. Things are never easy with Linux. When I ran the install the first time it failed citing that insufficient space is present at the /tmp directory. This is shown in the next snapshot.


I checked the free space and all and it was fine as shown in the next snapshot.


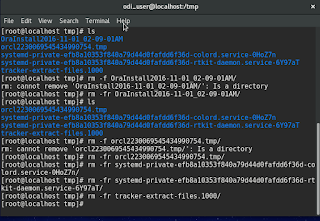
The next snapshots show me deleting the contents of the tmp directory using the rm command and doing it recursively.

 Once
all the files are deleted, I run the installer again as shown in the next
snapshot.
Once
all the files are deleted, I run the installer again as shown in the next
snapshot.
 However,
the install fails since I am running it using the root credentials. To run the
install, it needs a user who is not root and is not a superuser.
However,
the install fails since I am running it using the root credentials. To run the
install, it needs a user who is not root and is not a superuser.

So I exit the root mode as shown in the next snapshot.
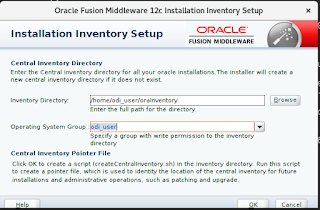
 The
next snapshot shows me running the install from the odi_user credentials.
The
next snapshot shows me running the install from the odi_user credentials.
 Most
of the pre checks pass successfully as shown in the next snapshot.
Most
of the pre checks pass successfully as shown in the next snapshot.

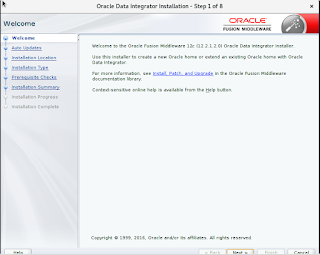
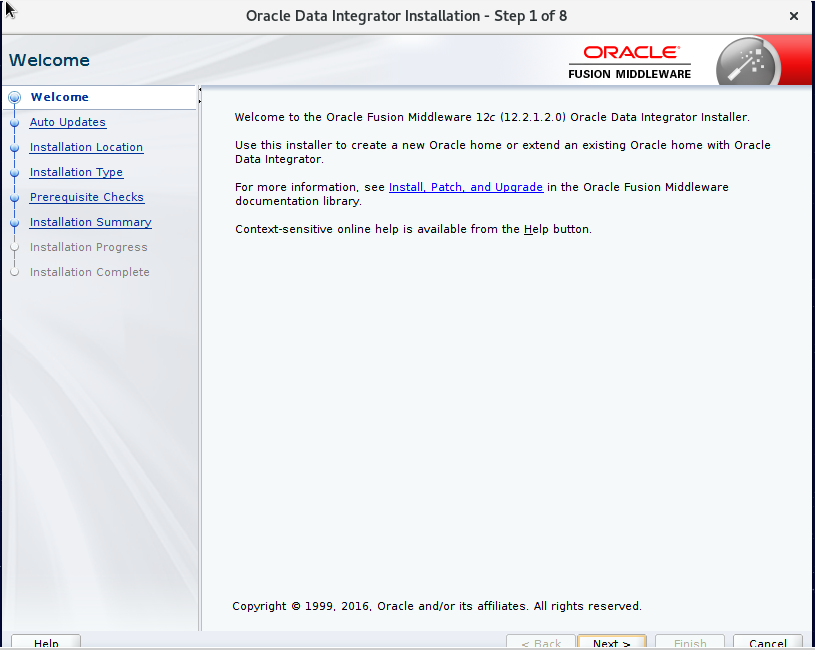
And the install starts as shown in the next snapshot. Drumrolls please....


 Now
let us start the ODI studio. I navigate to the path of ODI studio and run the
odi.sh command that calls the ODI studio UI. This is shown in the next
snapshot.
Now
let us start the ODI studio. I navigate to the path of ODI studio and run the
odi.sh command that calls the ODI studio UI. This is shown in the next
snapshot.
 The
ODI studio needs the path of the JDK environment for the studio to startup the
first time. I give the path of the Oracle JDK as shown in the next snapshot and
the studio starts up successfully as shown in the next couple of snapshots.
The
ODI studio needs the path of the JDK environment for the studio to startup the
first time. I give the path of the Oracle JDK as shown in the next snapshot and
the studio starts up successfully as shown in the next couple of snapshots.


 And
Houston, we have landed on the ODI moon…Next steps would be the setup of a
repository and testing that it works.
And
Houston, we have landed on the ODI moon…Next steps would be the setup of a
repository and testing that it works.
Things learned in the exercise:-
Now, the ODI installables are downloaded as zip files. In order to start the install, the first step that has to be done is to extract the zip files into a single directory. This is shown in the next couple of snapshots.
The snapshot of jar files after extraction is as shown in the below snapshot.

Now the fun part starts. Things are never easy with Linux. When I ran the install the first time it failed citing that insufficient space is present at the /tmp directory. This is shown in the next snapshot.


I checked the free space and all and it was fine as shown in the next snapshot.

To fix the problem, we need to take two steps. This has more
to do with the machine configurations. The first thing is that the install in
happening on a Linux virtual machine. I had created this machine with a RAM
space of 4GB. However, when the install runs the program asks for almost 2.5GB
which exceeds the system limits. In order to run the install successfully, I
increased the RAM on the virtual machine to be almost 5.5GB. This would mean
that the space requested would not exceed the system resources.
The second thing that I had to do was delete some of the
temporary files that are present in the /tmp directory. This is shown in the
next couple of snapshots.
The next snapshot shows the contents of the tmp
directory.
The next snapshots show me deleting the contents of the tmp directory using the rm command and doing it recursively.


So I exit the root mode as shown in the next snapshot.


And the install starts as shown in the next snapshot. Drumrolls please....


Things learned in the exercise:-
- Difference between OpenJDK and Oracle JDK
- Installing JVM
- Root user cannot be used for ODI install.
- tmp free space issue.
No comments:
Post a Comment