In this blog, I will talk about using the DRM Migration client
for setting up Planning metadata in DRM. Now in one of my previous blogs I had shown
the steps to create an application in DRM
Now, by default, there would not be any specific metadata
objects (Planning, HFM, etc.) set up in the application when you create it.
This is because it is very well possible that you may want Planning and HFM
metadata to sit in different applications (beats the point of having DRM, but
you do have to see the beauty in deployable and pluggable components) or you
may want to create a DRM application for a very specific or targeted metadata that
you have.
Now, let us set up the Planning metadata in our very own DRM
application.
To do this, we make use of the DRM Migration client utility.
Now to launch the utility, use this URL:-
http://<server where DRM is
installed>/drm-migration-client/
A
window opens up as shown in the below snapshot:-

There are four options listed:-
Extract: - To extract DRM metadata objects.
Load: - To load metadata objects from a file into DRM
Difference: - To view the difference between metadata
objects
View File:- To view a metadata object file
Today we are going to choose the Load option. Once you click
on the Load button the below file browser screen shows up.

Now, by default, there will be application metadata
templates stored in the server where DRM is installed. The path where this is
stored is usually as follows:-
<Drive where DRM is installed>:\Oracle\Middleware\EPMSystem11R1\products\DataRelationshipManagement\server\app-templates
I browse to those path and you can see the various files
listed there as shown below.
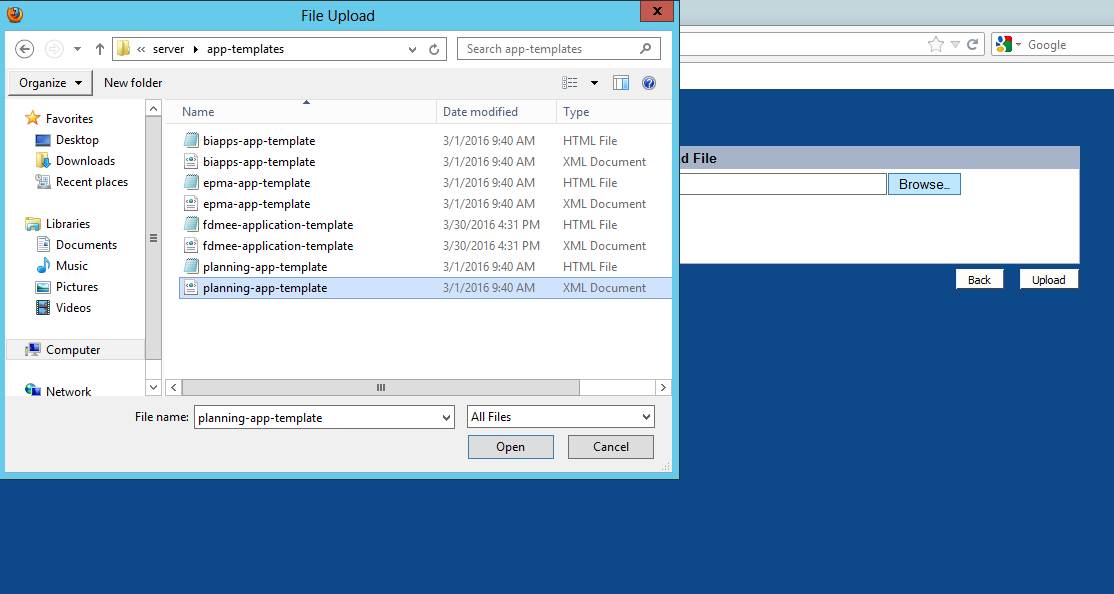
I choose the Planning application template and click on the
upload button.
Once the file is uploaded, DRM gives me a file information
overview. This is listed in the below 2 snapshots. I click on the next button
to proceed with the upload.


After hitting the next
button, I am asked to set up connection to a DRM application.


Once I am successfully test connected, I hit the Log In button
to start the next steps in the metadata upload process.
The next two snapshots list all the artifacts that we have in
the Planning XML file. ( I will do an analysis of the structure of the XML
later.)


On clicking the next button, DRM reviews the object dependencies
and tells me if there is some error in the DRM objects that are defined. Since
this is a default file, it passes of review phase successfully.


On clicking the Next button in the above snapshot, I reach
the gates of Mordor… DRM asks me if I would like to Run the load as shown in
the below snapshot.

I click on the Run Load button from the above snapshot and
the process of importing the Planning DRM objects into my DRM_DEV application
starts.
After some time, the screen will show you the status of the DRM object load.

In our case, the load has been executed successfully.
Now if I login to my DRM_DEV application, and navigate to
Administer->”Property Definitions”, I can see the recently imported HP
properties listed as shown in the below snapshot.

The member property for a specific member is as shown in the
right of the below snapshot.

No comments:
Post a Comment