Installation of Squirrel SQL Client
In this blog I am going to talk about the installation and
configuration of Squirrel SQL client that basically gives administrators a Java
UI to manage databases.
SQquirrel SQL Client basically uses JDBC to interact with
databases using a JDBC driver. So if you have done programming in Java Swings,
you are going to be right at home with this application.
The client can be downloaded from www.squirrelsql.org
The first thing that I did was downloaded the Squirrel SQL
client that came as an executable jar file as shown in the below snapshot

Once the Squirrel SQL client Jar file has been downloaded,
you can just double click it to start the process of the software install. The
snapshots are present below and they are pretty straightforward and do not need
a lot of explanation.


Configuring Drivers
for Squirrel SQL Client:-
Now I will show you the steps on how to configure the
Squirrel SQL client for Oracle database. Navigate to the folder where you
installed the Squirrel SQL Client. You will find a “squirrel-sql.bat” file that
can be used to launch the client in a Windows environment. There is also a
squirrel-sql.sh file that can be used to launch the SQL client in a Unix/Linux
environment…
Double click on the batch file to start the Squirrel SQL
client.


The above screen is the first screen that will be visible
when we login to Squirrel SQL client. The UI has its own nomenclature and I
will try my level best to explain it.
Drivers allows you to configure the driver details for
native databases that are JDBC compliant. Since I have Oracle installed on my
system, I will show you the configuration of the driver here.
Aliases are basically an alias name for connection
information like databases, drivers, configurations and so on.
Click on the Drivers button in the above screenshot, to
display the list of associated drivers in the system.

Go to the Oracle Thin Driver in the shown list and click on
the edit button as shown in the below snapshot.

A popup screen appears that will ask for details of the
connection to the database. These can be entered as shown in the below
screenshot.
The Example URL can be explained as follows:-
- jdbc.oracle.thin is the name of the driver.
- localhost is the name of the server where Oracle is installed
- 1521 is the default port on which Oracle is installed.
- XE is the default service name of the Oracle database.

The name of the driver is Oracle Thin Driver and the class
name for this is oracle.jdbc.driver.OracleDriver.
For those of you who are familiar with JDBC, this would be
very simple since these are the basic steps that we follow while connecting to
an Oracle database using JDBC.
Since the jar file that implements the OracleDriver class is
not pre-shipped with the Squirrel SQL client, we would have to add it manually
using the “Extra Class Path” pane as shown in the below snapshots.

Click on the add button and browse to the path where Oracle
JDBC jar is present… In my case I have this file on my desktop… If you have
Oracle installed on your system this would be at the following path
C:\oraclexe\app\oracle\product\11.2.0\server\jdbc\lib
Select the JAR file and click on the open button.

It will be listed as shown in the below snapshot.

Click on the OK button to see if the configuration is
successful or not.

In our case the Driver was successfully registered with
Squirrel SQL client.
To show only the successfully registered drivers, go to
“Drivers” and select the CheckBox “Show Loaded Drivers Only” as shown below

The output after this is only the successfully registered
drivers will be visible now.

Creating an Alias for
Database connection
Now the steps for creating an Alias for the database
connection.
Click on the “Alias” button and choose the “Add Alias”
button as shown in the below screenshot.

Give a name to the Alias, the driver that you want to use
for the database connection, the URL of the database and the credentials to
connect to the database as shown in the below screenshot.

Click on the “Test” button to test the database connection.
A new popup window opens with a summary of the details that you entered before.
Click on the Connect button to test the connection.


The status of the connection is Successful. Hit on the OK/Connect
buttons recursively to save the connection info.
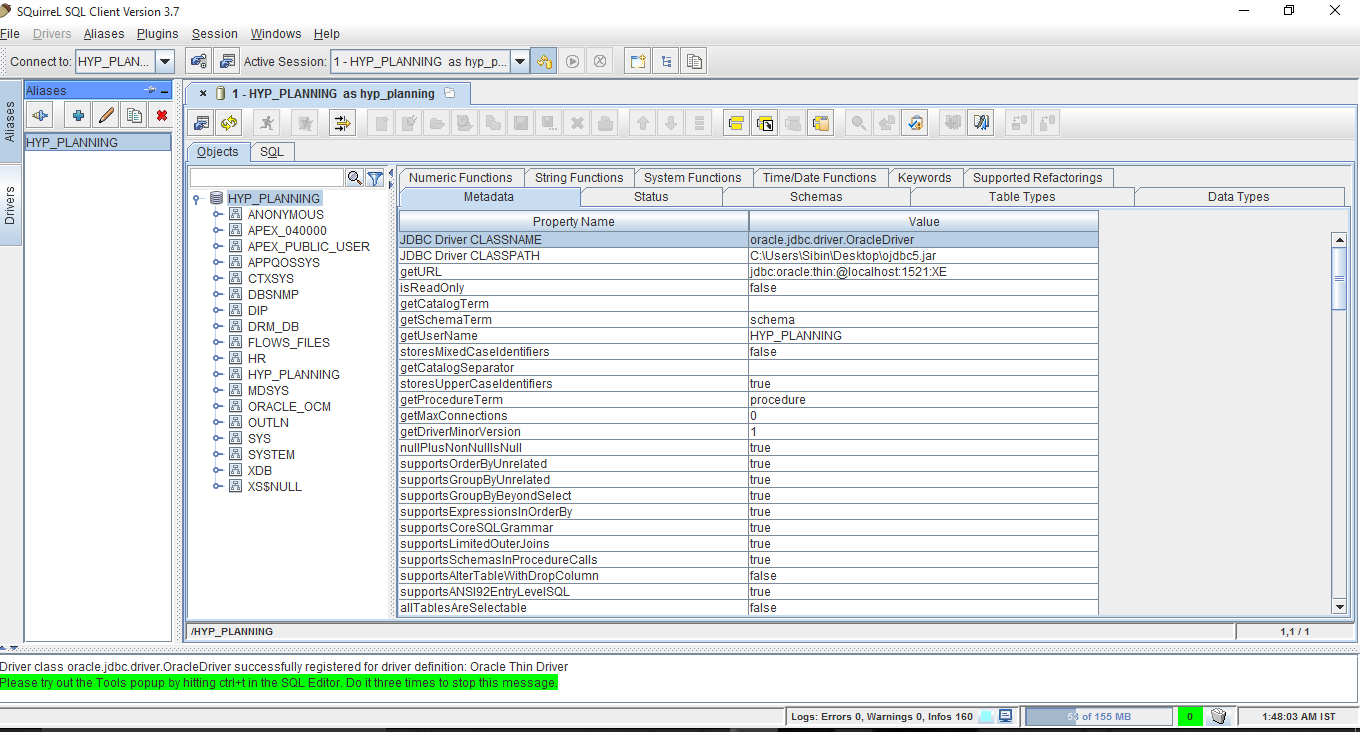
Once the connection is
established, you will be able to see a bird eye view of the system from the
logged in users perspective as shown in the below screenshot.
No comments:
Post a Comment