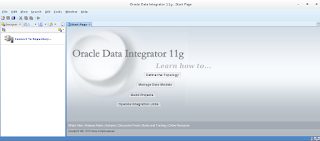
In this blog, I would be talking about how to install Oracle Data Integrator for enabling Universal Data Access in FDMEE. Well, I have to be honest here. I am a big fan of FDMEE, but enabling Universal Data Access, which involves configuration using ODI was a bit tedious and personally, I would have preferred the entire setup to be a lot more simpler.
Internally we all know that FDMEE makes use of ODI as its internal engine. Now the version of ODI that is used by FDMEE is ODI 11G and you will have to install ODI 11G Studio to enable access to this FDMEE environment(Got some interesting results when I tried to access FDMEE work repository using ODI 12C). In this blog, we would first concentrate on installing the ODI 11G.
Now, the installer which we will choose for ODI can be downloaded from Oracle E-delivery. The next couple of snapshots show me choosing the ODI versions for install.
The downloaded file would be a zipped file which I have then extracted to a folder.
The next couple of snapshots show me navigating to the path where the installer script for Linux is present and running it.
(Note: The Linux installer asks for the path of the JDK that is present on the server and requires Oracle JDK for a successful install of ODI. If you have OpenJVM JDK, the install will fail saying that this JVM version is not supported.)
The installer asks for a path for the Inventory directory which is shown in the below snapshot.
The createCentralInventory.sh script needs to be run with the root privilege and the next snapshot shows me executing that script successfully.
The next snapshots show the install of ODI. This is pretty much straightforward and not much explaining to do.
You just need to install the ODI Studio for accessing FDMEE setup and this is shown in the next snapshot.
Now a lot of my pre-configuration environment checks have failed but I decide to continue with my install anyway.
Specifying the path for my ODI Oracle home is as shown in the below snapshot.
Don’t want to create any repositories so I skip the repository configuration as shown in the next snapshot.
Get a “File not found” error, but this should not be a showstopper and continue with the install.
The above snapshot shows that the ODI installation has been completed successfully.
The next couple of snapshots show me launching the ODI Studio console from the command line.
In the next blog, we will see how to access FDMEE work repository from the ODI Studio console.


I really appreciate the information shared above. It’s of great help. MaxMunus provides Remote Support For Corporate and for Individuals. If anyone is facing any issue in his project of # ORACLE DATA INTEGRATOR we can support them remotely , kindly contact us http://www.maxmunus.com/contact
ReplyDeleteMaxMunus Offer World Class Industry best Consultant on#ORACLE DATA INTEGRATOR. We provide end to end Remote Support on Projects. MaxMunus is successfully doing remote support for countries like India, USA, UK, Australia, Switzerland, Qatar, Saudi Arabia, Bangladesh, Bahrain, and UAE etc.
Saurabh
MaxMunus
E-mail: saurabh@maxmunus.com
Skype id: saurabhmaxmunus
Ph:(0) 8553576305/ 080 - 41103383
http://www.maxmunus.com
Hi sibin jose,its a great to share about Oracle data integrator installation thank u so much for providing for this useful info.
ReplyDelete